Recently, we’ve had an influx of clients by new Windows 8 computers and needing to set up their emails. Windows 8 dropped support for POP3 Accounts, but this doesn’t mean you can’t still use your email.
So, we’ve decided it would be better to put this step by step guide together to help you set up your emails.
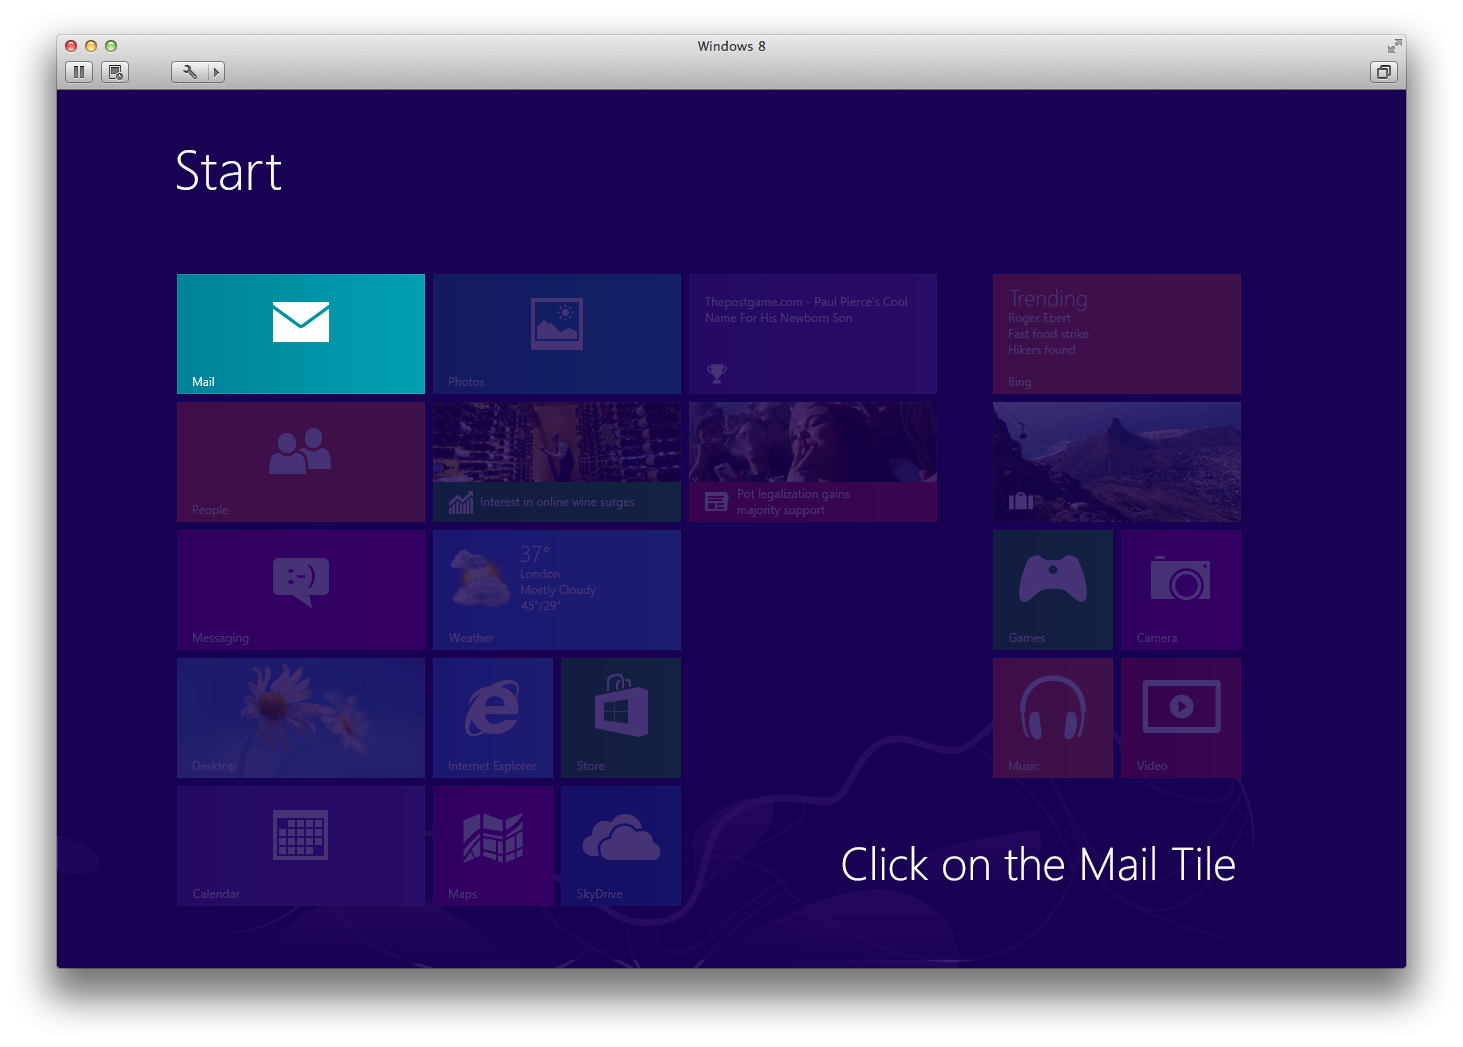
1) Ok, Step 1 is quite simple, once you’ve started Windows 8, just select the Mail tile, which is by default, the very first time at the top left, It’s blue with an envelope on it!
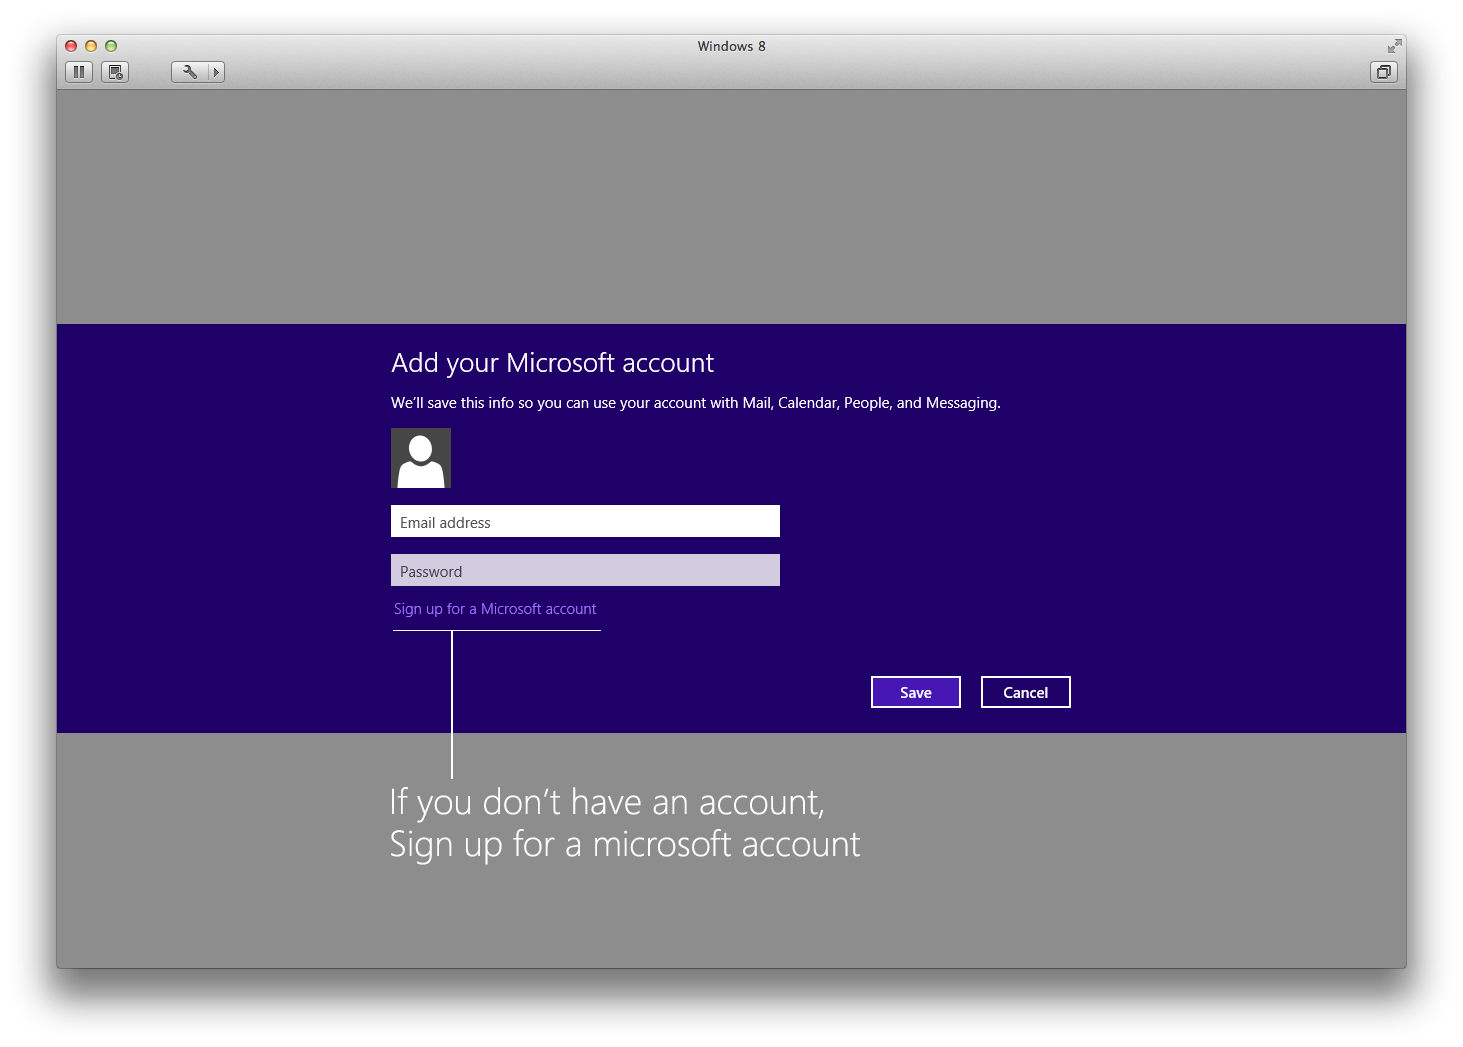
2) If this is a new computer, sign up for a Microsoft Account , if you set up a Microsoft Account when you first started Windows 8, all you’ll need to do here is sign in.
When you’re going through the sign up process, if it’s easier for you, you can set up your account name to be your email address and password, rather than having an Outlook or Microsoft based email.
3) Once you’ve signed into your account, you’ll be presented with 3 options:
- Exchange
- IMAP
- POP
Kind of deceptive here, because POP isn’t supported, so when you select pop, it just tells you it can’t do it and leads you to a dead end.
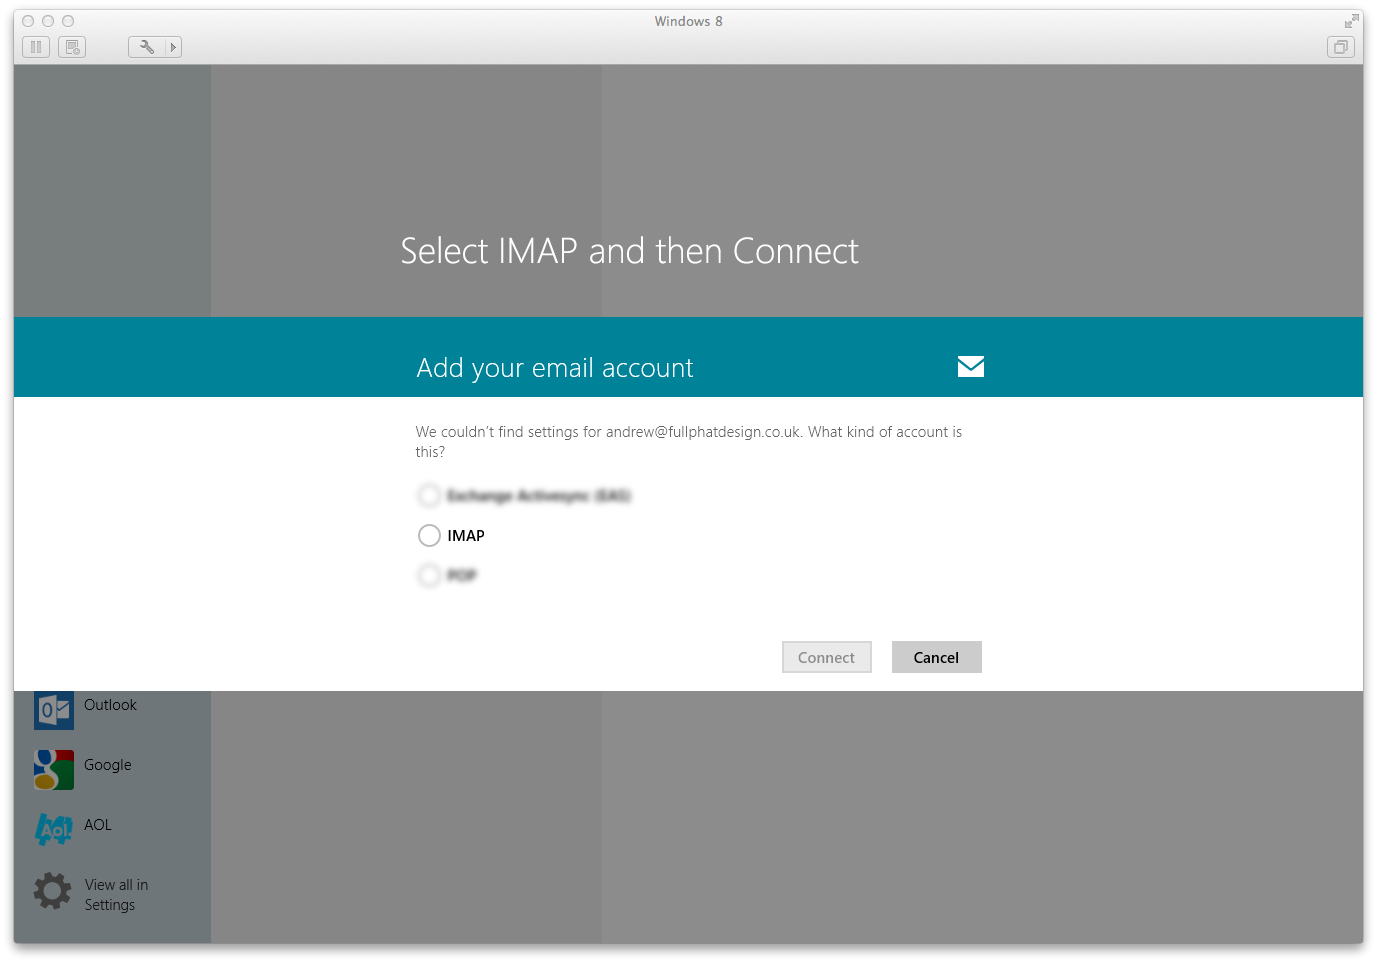
SO Select IMAP from the options and click Connect.
IMAP syncs your mailbox to your computer, so if you delete an email on an IMAP email, you’ll delete it from every device that is set up with your email. This comes in useful when you’re getting 50 emails a day and have a mobile, a tablet, a work computer and a personal one.
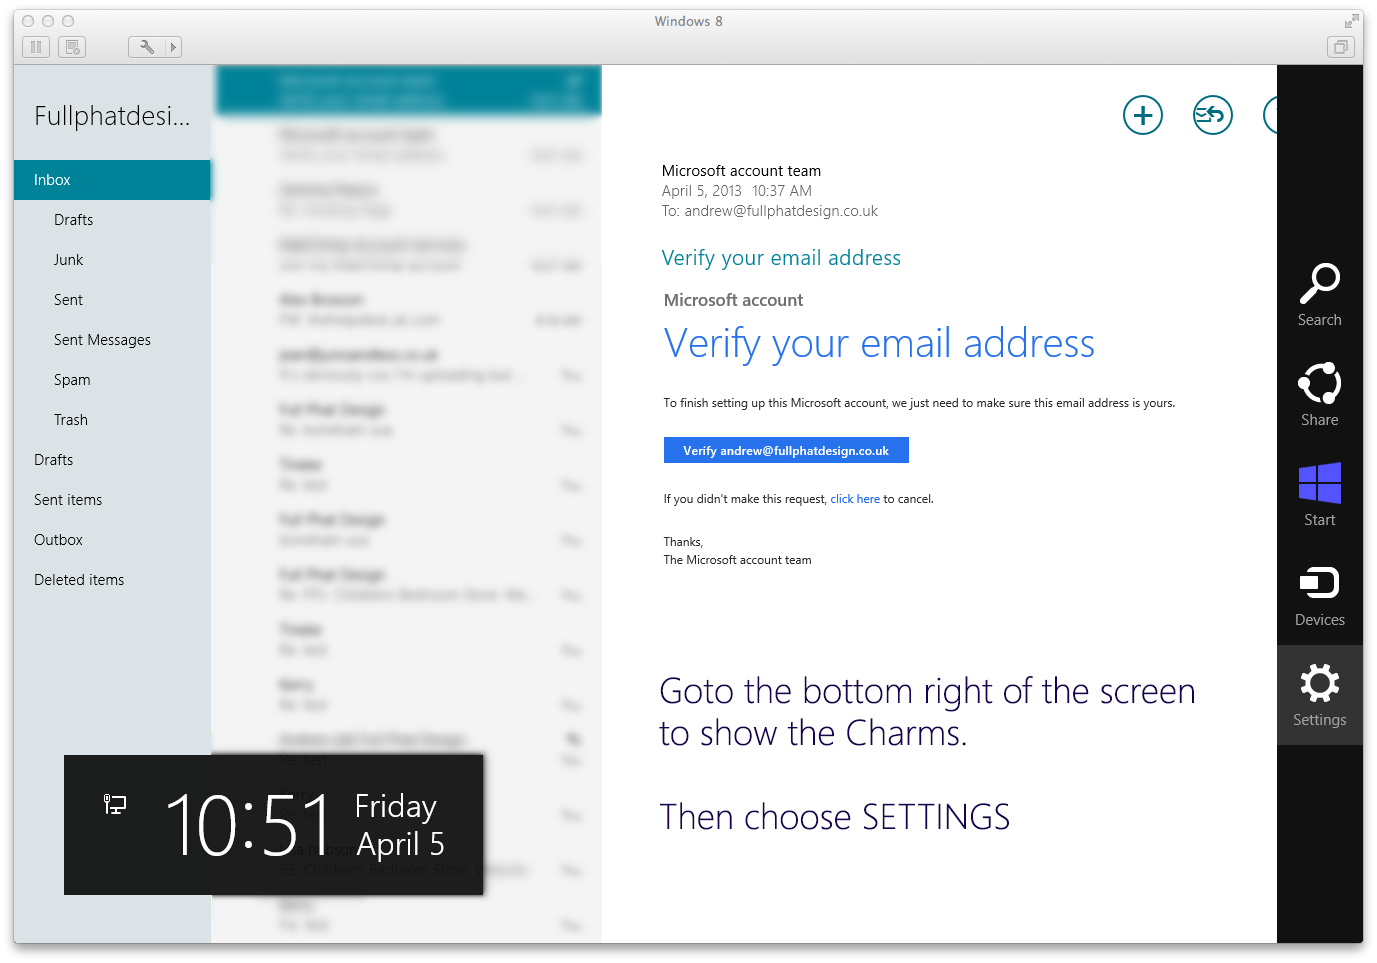
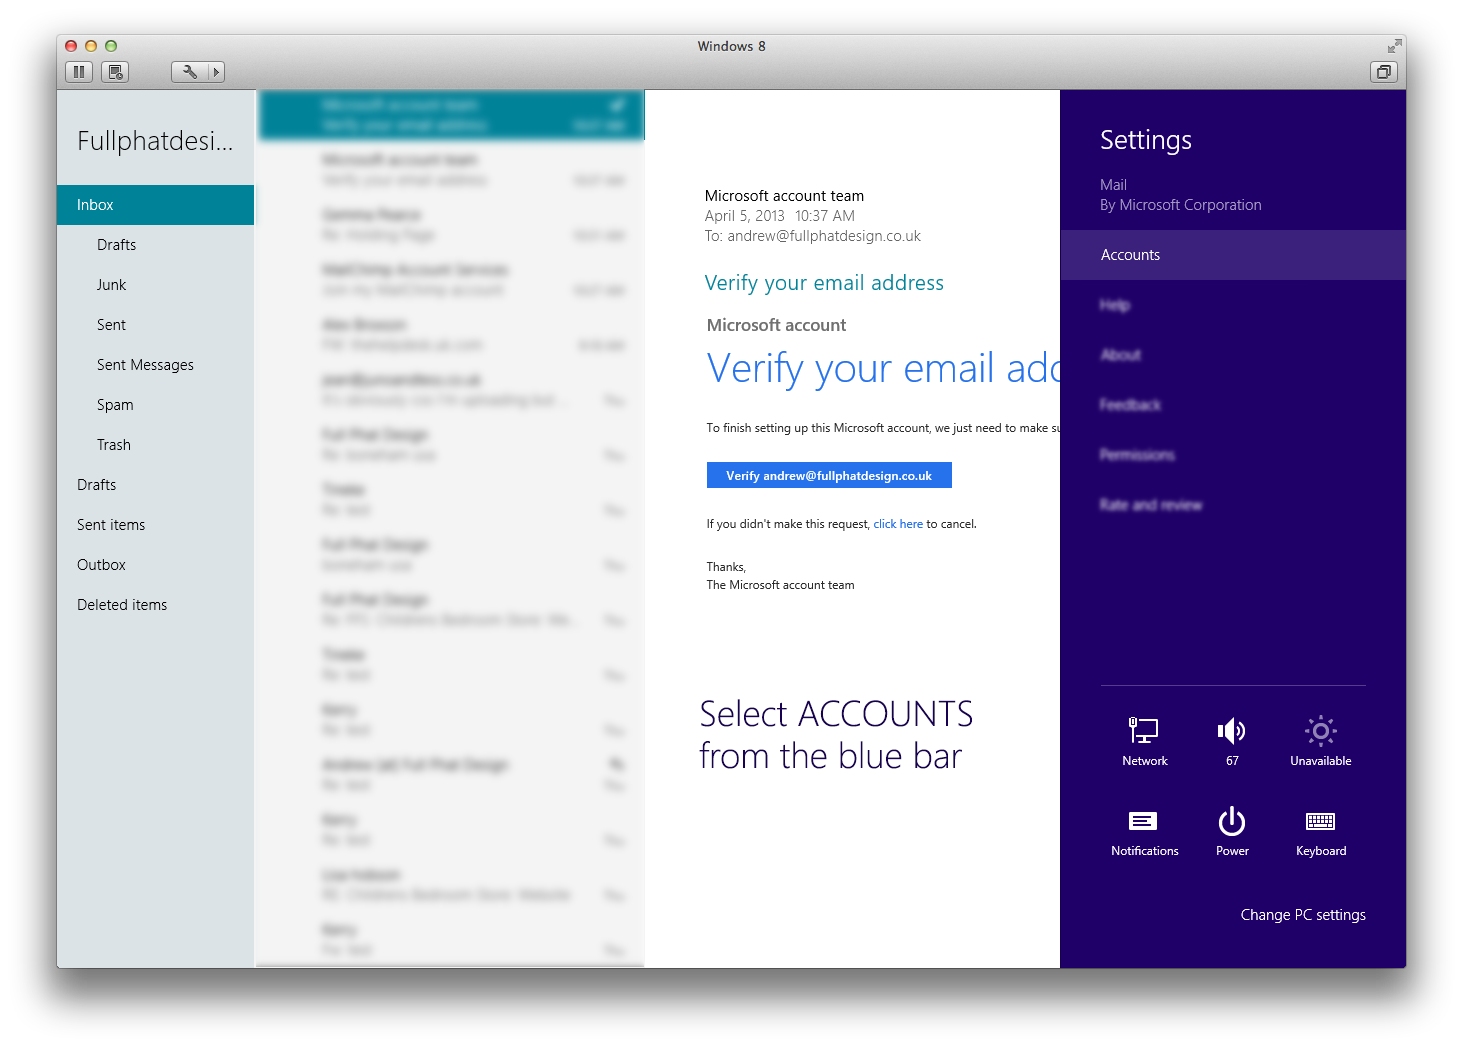
NOTE: If this box doesn’t show up, for example, if you own a personal hotmail account or have signed up before and you can only see your personal emails, all you have to do from here is go to the bottom right corner of your screen to make the CHARMS display.
Once they show, you can select SETTINGS
5) A blue section will slide onto the screen, and you just have to select ACCOUNTS
You’ll then see a list of your accounts, if you’ve already added your personal email, you’ll see it here. You’ll want to select Add an Account to literally add a new account.
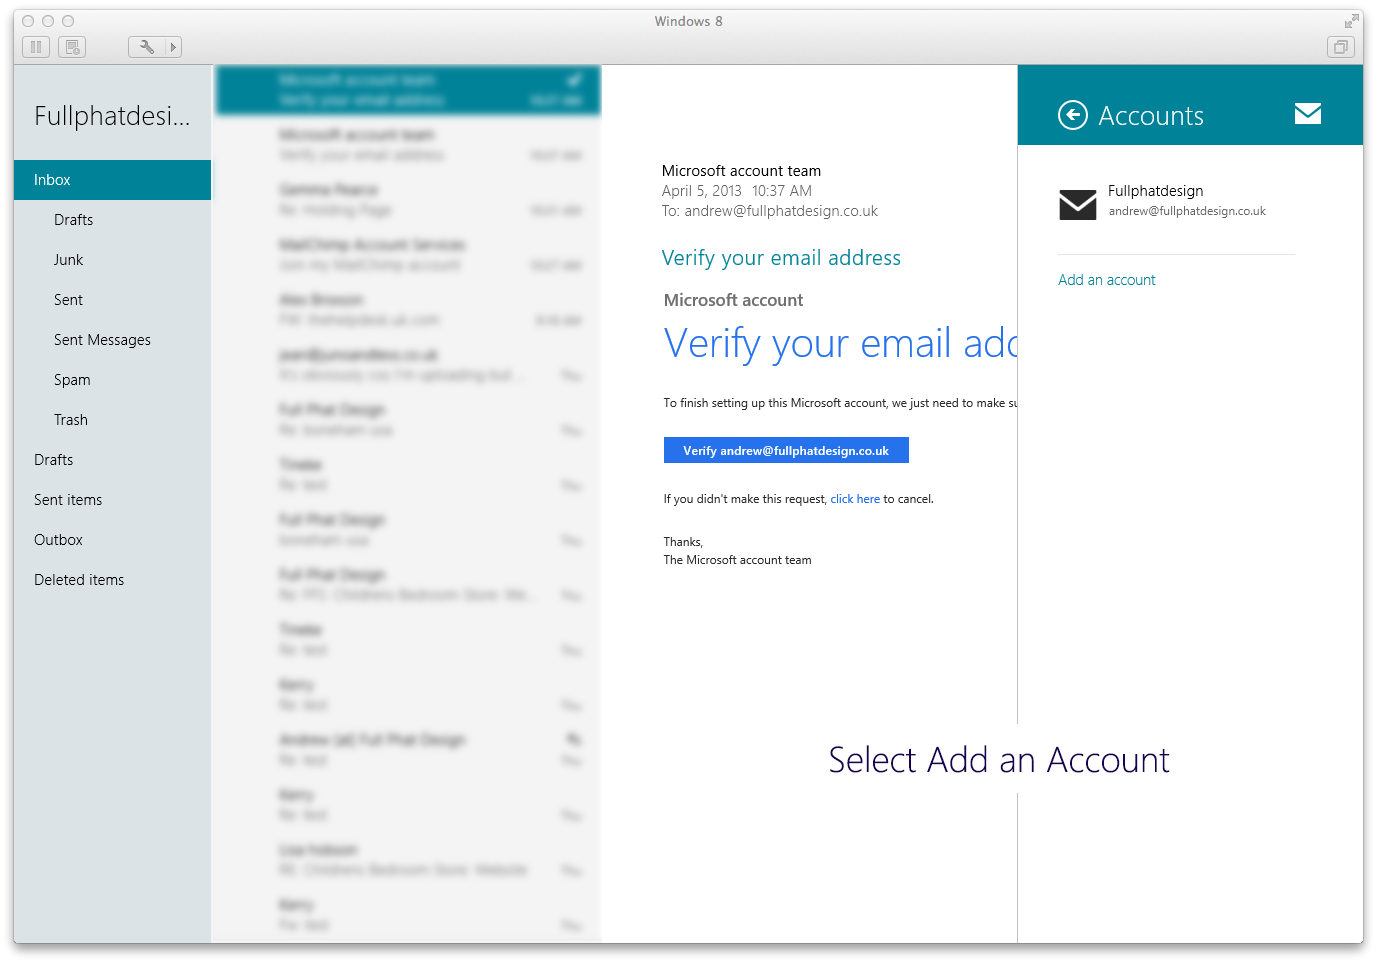
6) You’re getting close now, select OTHER ACCOUNT ( A side note: This is where you could add another personal account you’ve got, ie: gmail, but we’ll leave that for now )

7) You’ll see two input boxes & an option to SHOW MORE DETAILS which you need to select to be able to see all the information you’re going to need.
Once you’ve got it to show a longer list of options, you can start filling it out with the matching details we’ve provided you. Here’s a gorgeous list of example data:
- Email address: info@domain.co.uk
- Username: info@domain.co.uk (Your email address again)
- Password: •••••••••• (This was provided to you)
- Incoming (IMAP) email server: mail.domain.co.uk
- Port: 143
- Incoming Server Required: NO (Untick this box)
- Outgoing (IMAP) email server: mail.domain.co.uk
- Port: 25
- Outgoing Server Required: NO (Untick this box)
- Outgoing Server requires authentication: YES! Leave this box selected
- User the same username and password to send and receive email: YES! Leave this box selected
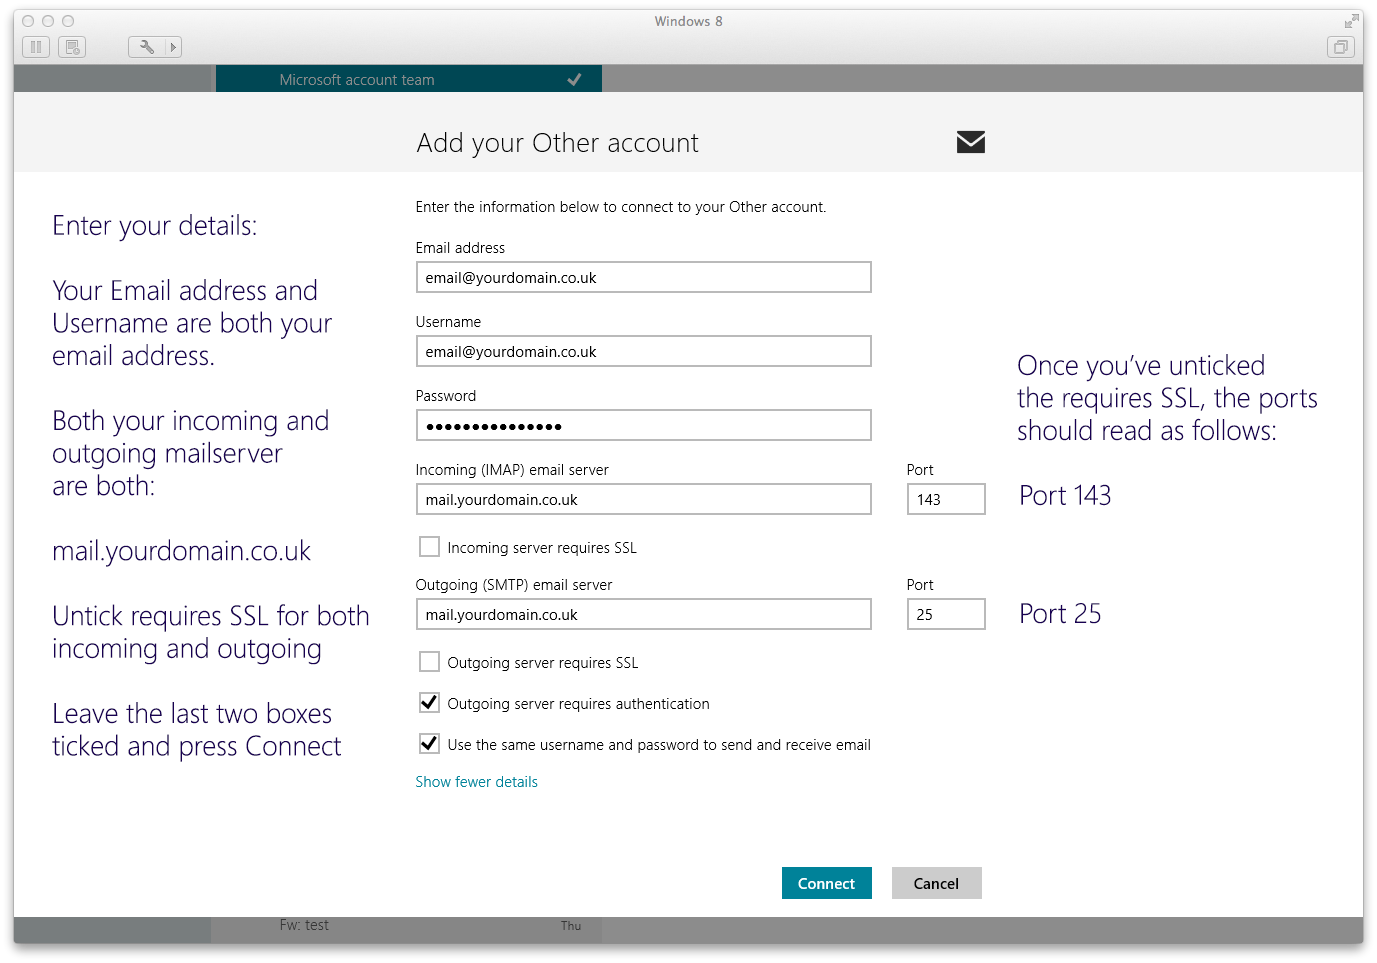
Once you’ve entered all this information, simply click CONNECT and prepare yourself to be amazed!
Congratulations!
You’ve now got access to your emails through the Mail tile on Windows 8!